The Settings screen is the first screen you’ll see when launching the app for the first time.

Here, you can:
- Enter your enrolment code (provided by your Solution Provider) to link the terminal to your account.
- Change the application language.
- Check the app version.
- Run a Full Sync to re-download all settings.
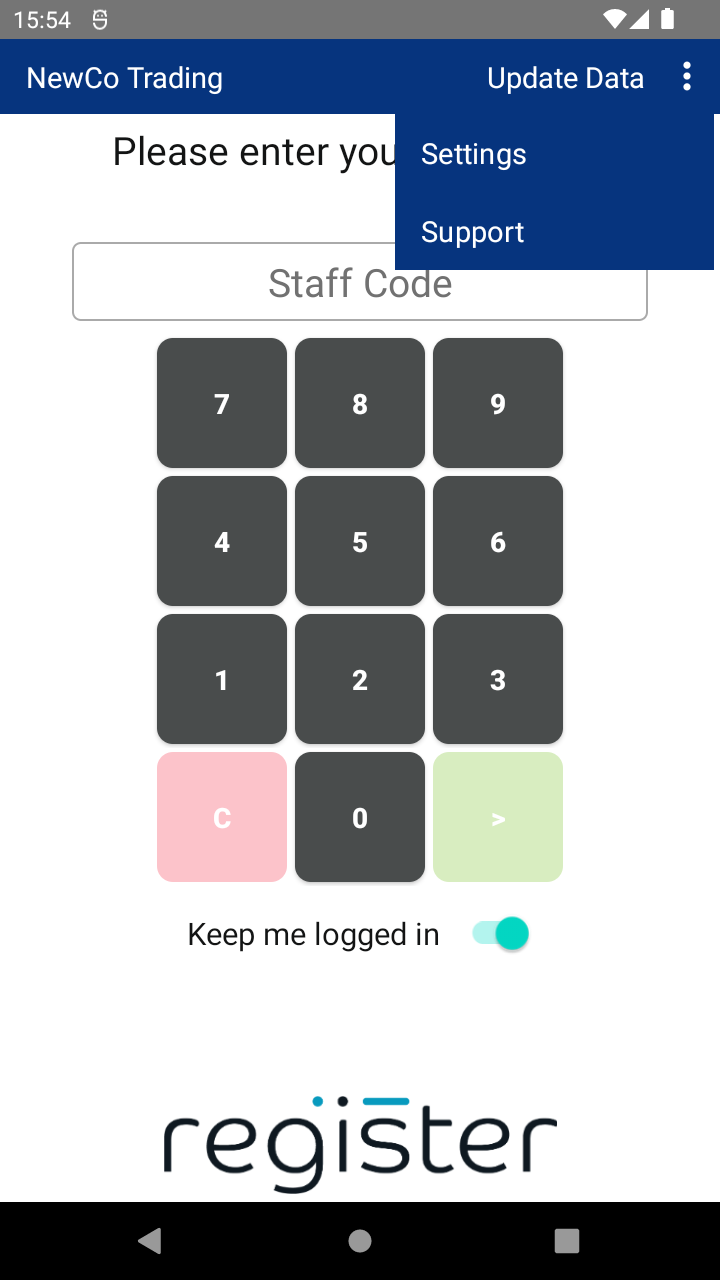
📍 To access Settings later: From the Login screen, tap the kebab menu ( ᎒ ) in the top right, then tap Settings.
📘 Learn more:
This is where staff members enter their Staff Code to access the system.
Also available from the login screen:
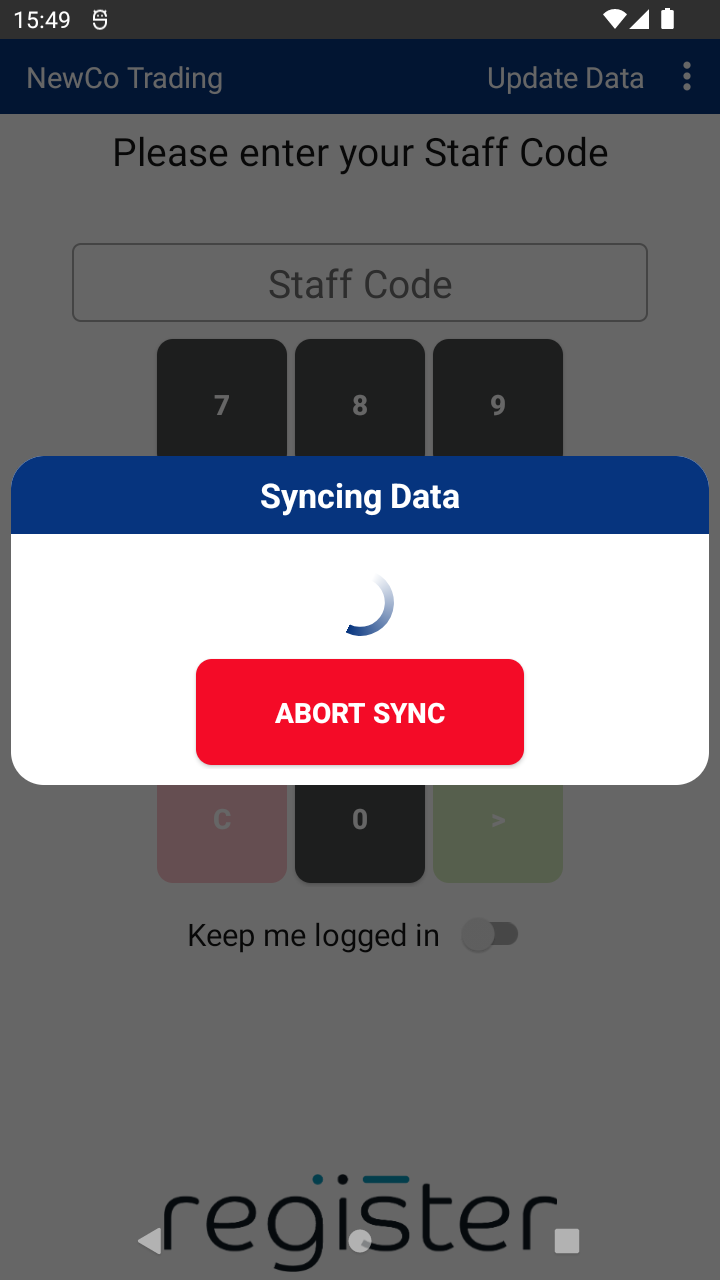
- Update Data – Syncs with the back office to download configuration changes and upload offline transactions.
- Access to the kebab menu ( ᎒ ) for:
- Settings
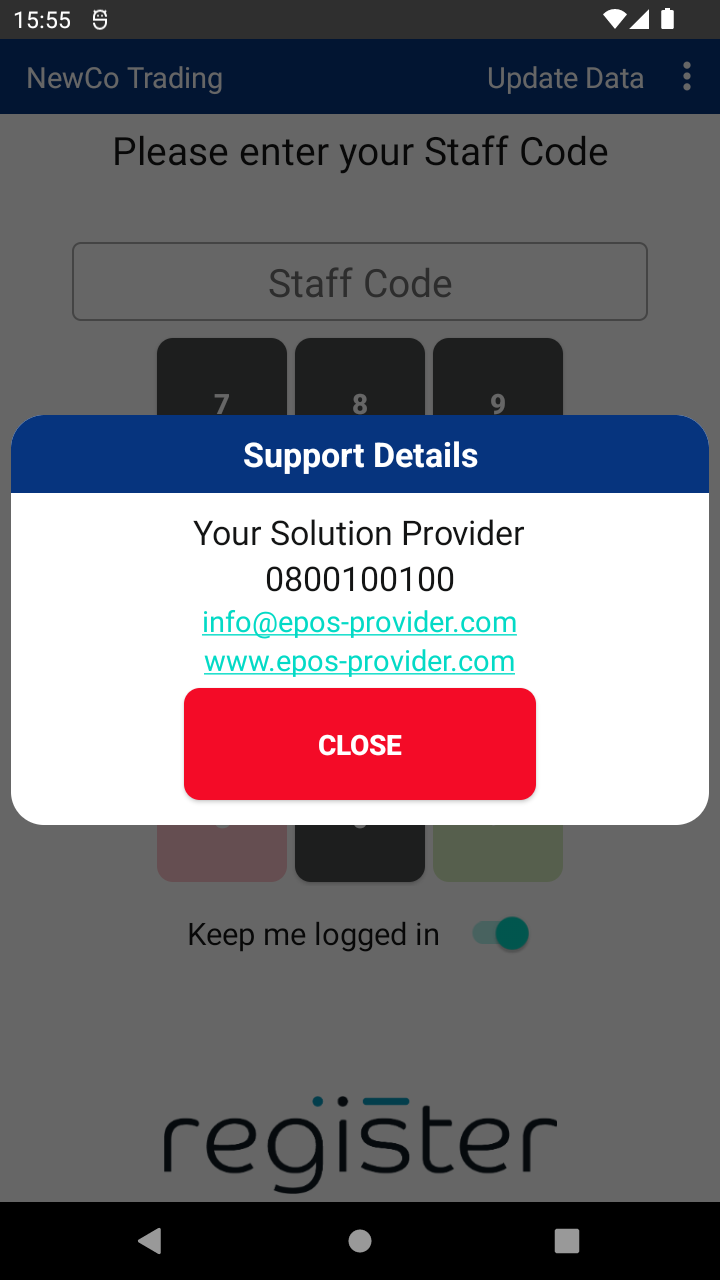
- Support Contact Details


📘 Learn more:
Tapping the Update Data button:
- Downloads the latest settings and updates from the Web Portal.
- Uploads any offline transactions stored on the device.
✅ Top Tip:
Before contacting support, always tap Update Data to ensure your terminal is synced.
This is your main screen for processing transactions.

Here, you can:
- Tap SALE or REFUND to start a transaction.
- Open the menu ( ☰ ) in the top left to access other features.
- Log out using Sign Off in the top right.
📘 Learn more:
On certain screens, you can access the main menu by tapping the hamburger icon ( ☰ ) in the top left.

From here, you can access:
⚠️ The menu may be greyed out during transactions. Complete or cancel the current process to enable it.
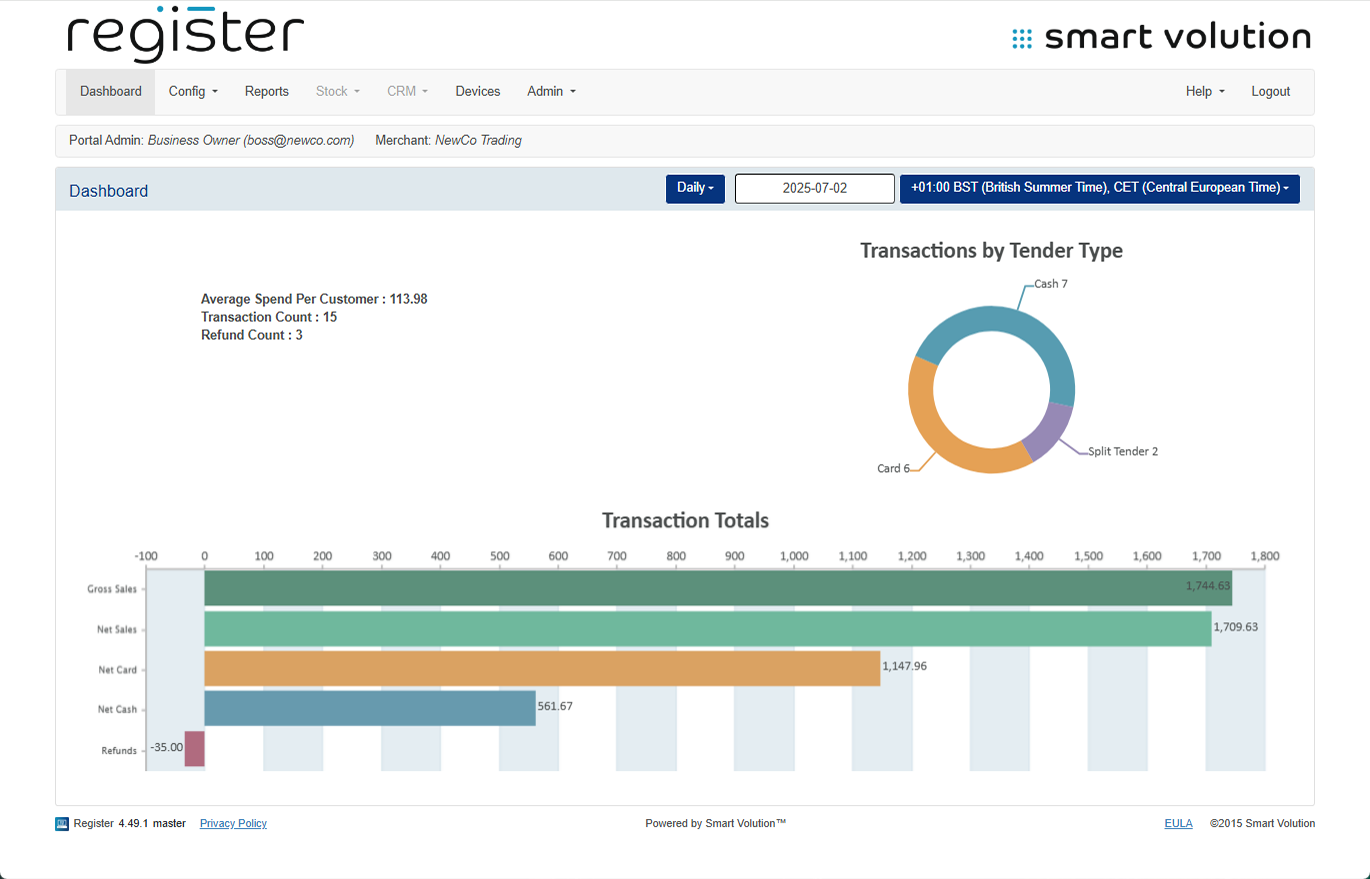
The Reports screen provides access to key sales reports:
- Terminal Report – Daily totals for this device
- Staff Sales Report – Totals broken down by staff
- Business Report – Combined totals for all devices (multi-terminal businesses)
Use the date controls at the top to view reports for different days.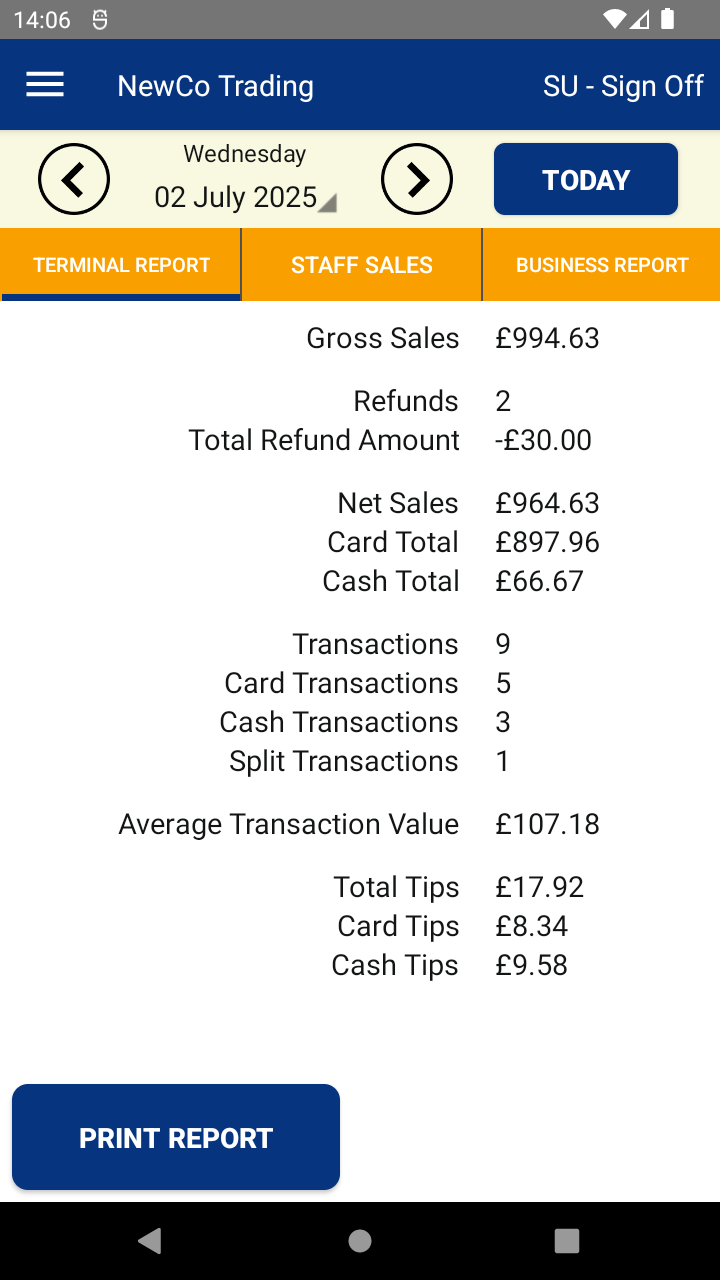


📘 Learn more:
The End of Day screen generates a Z Report, showing all sales since the last end-of-day close.
📌 For some payment integrations, completing this step also triggers batch close/settlement on your payment terminal.
📘 Learn more:
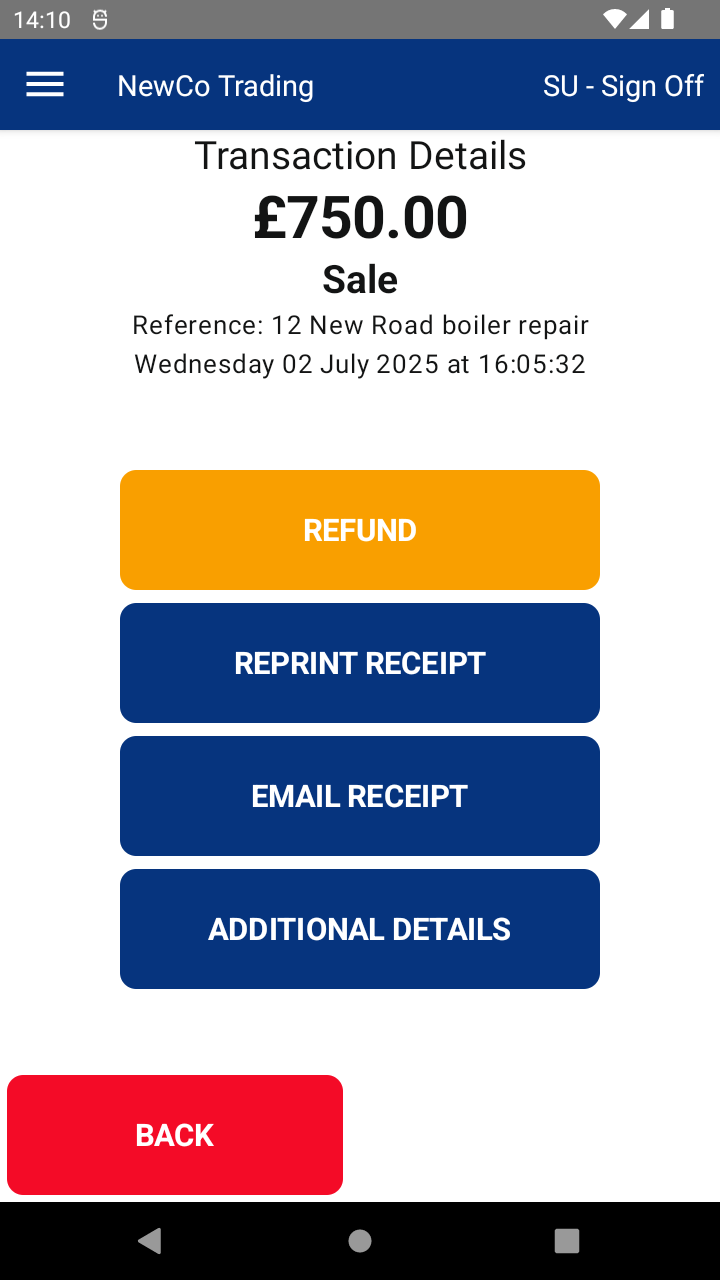
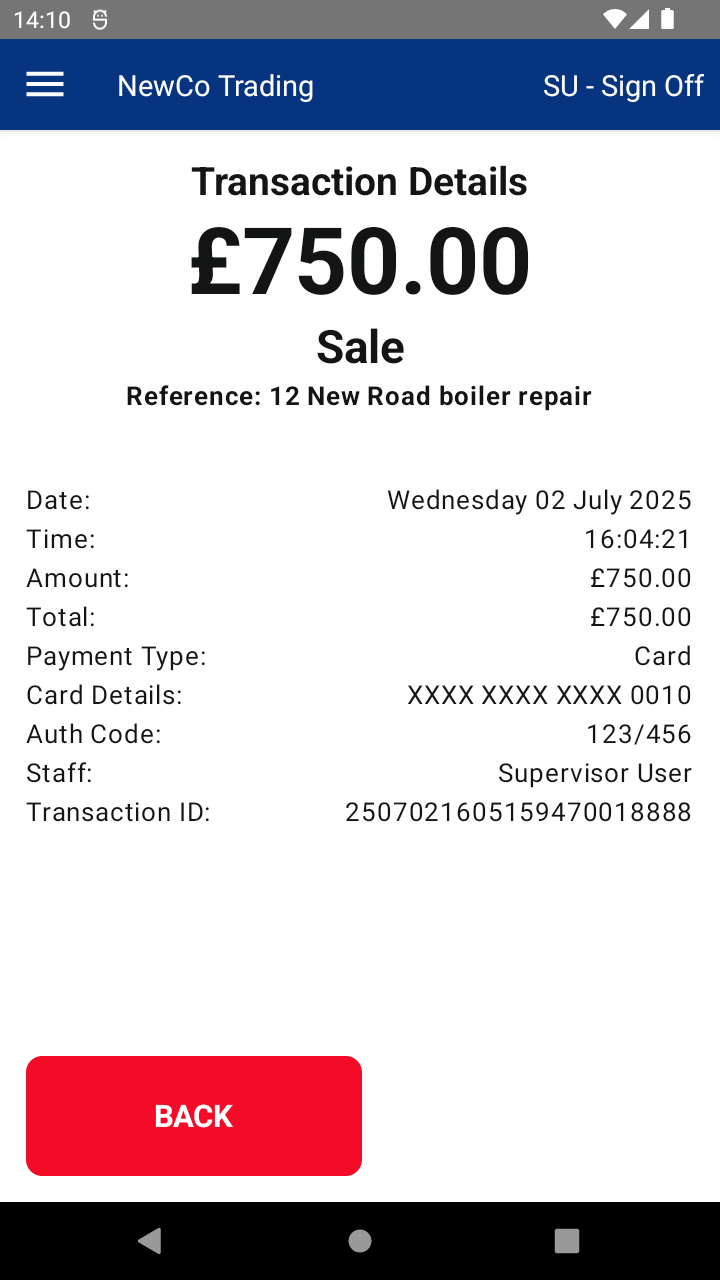
View past transactions directly on your terminal. Tap on any transaction to:
- View more details
- Print or reprint a receipt
- Issue a refund (if applicable)
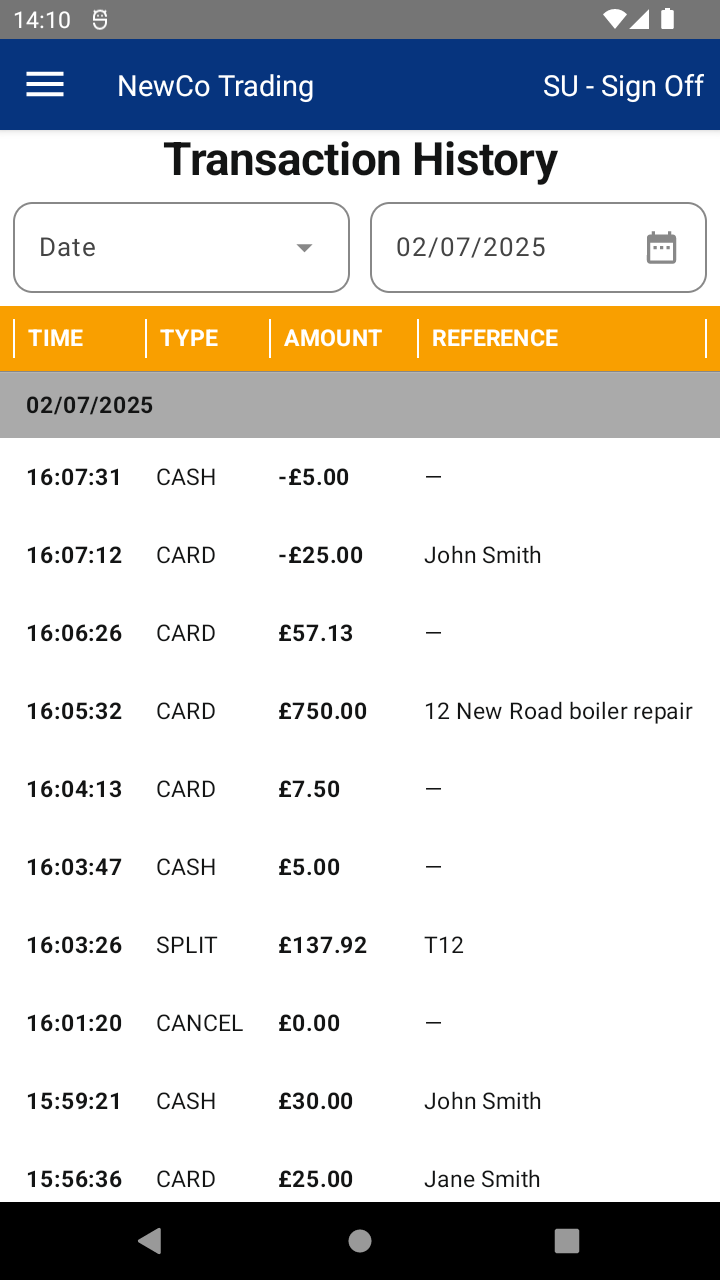
You can also search for transactions stored in the Web Portal using:
- Date
- Reference
- Transaction ID
- Last 4 digits of the card
📘 Learn more:
The Staff screen allows you to manage team members who can access and operate the system.


From this screen, you can:
🔍 Search staff – Quickly locate a staff member by typing their name into the search bar.
➕ Add a new staff member – Click the New Staff button to create a new user profile.
✏️ Edit staff member details – Click the edit icon (✎) next to a staff member to:
Update their role (e.g. Standard User, Supervisor)
Change or reset their staff code for secure login access
📘 Learn more:
Use this screen for troubleshooting and system information.


Sections include:
- About – View your device info (last transaction, version, enrolment code, etc.)
- Troubleshooting – Check internet and portal connections, access Wi-Fi settings, or exit the app.
📘 Learn more:
Tap User Guide in the app menu to view the full online version of the user manual.

Tap Support to view contact details for your Solution Provider.
📘 Learn more:
Tap Upgrade to learn about features in higher-tier plans.
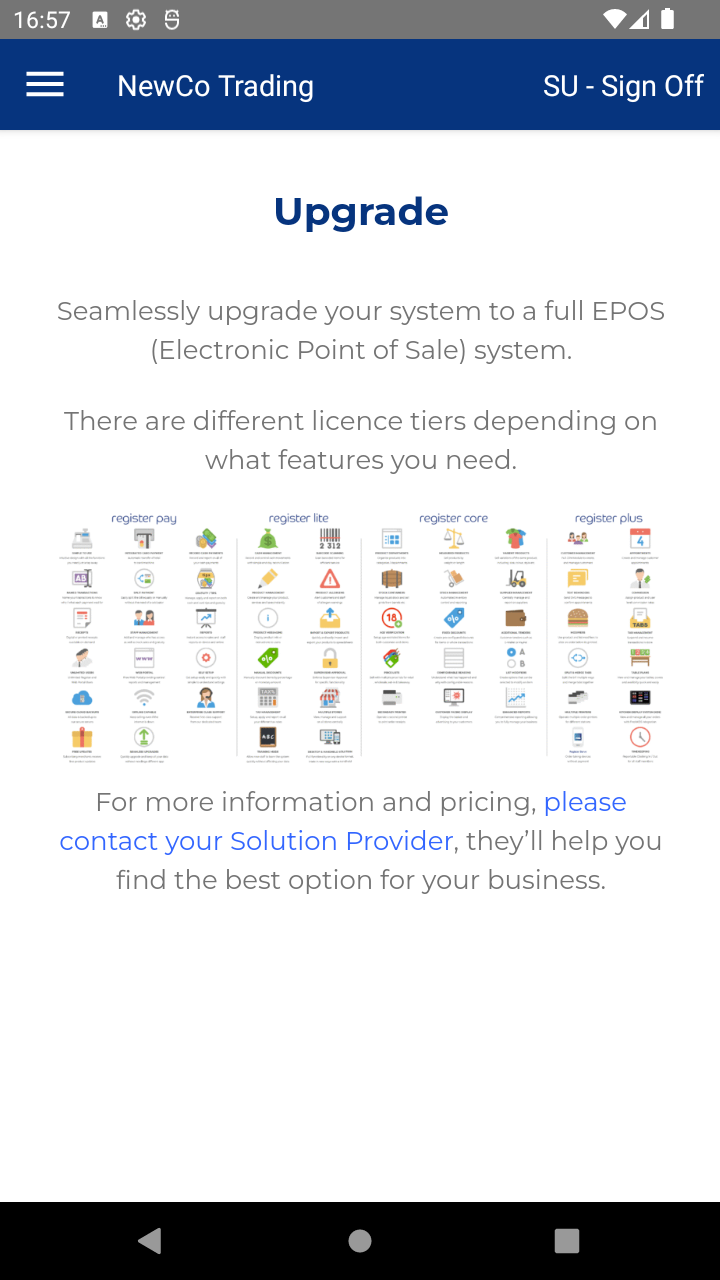
📘 Learn more:
Your system is managed through the Web Portal, where you can:
- Manage staff and configurations
- Access and export centralized reports
- View all transactions from all devices

📘 Learn more:

